Introducing 3:1 heat shrink tubing to have you labeling like a Pro
Printing safety signage
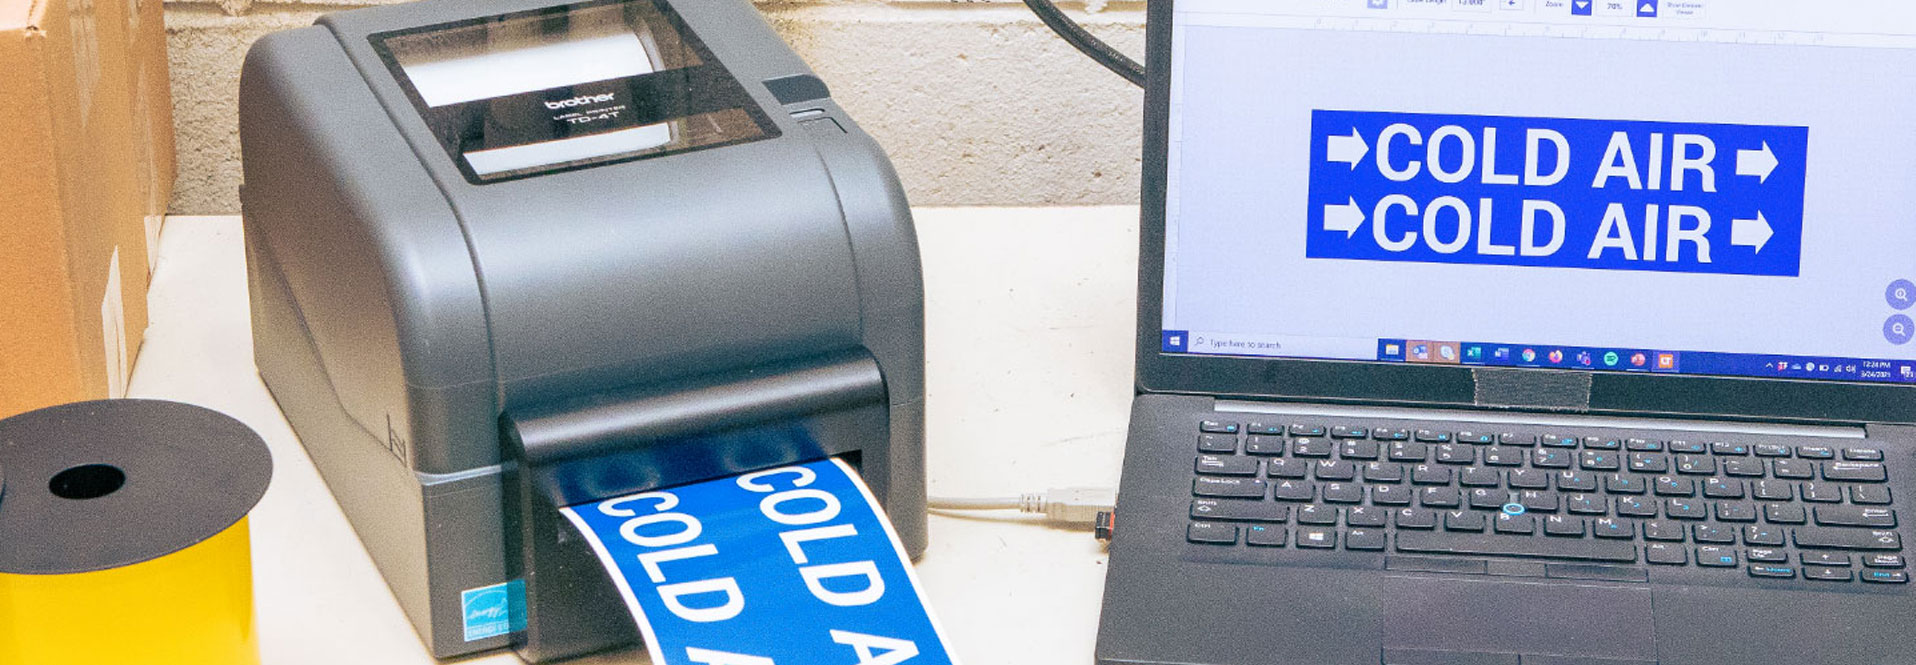
Getting started with your on-demand safety labeling solution for Windows operating system.
All the steps you need to start creating and printing
Learn how to install the Brother TD-4750TNWBCS printer driver and LabelSuite™ design software, the key steps needed to set up your printer, how to print your first label, and how to order additional labels and ribbons.
Install Windows printer driver
-
Turn on the printer and connect it to a PC
-
Download the 2019.2 M-6 printer driver here
-
Follow the driver wizard through the instructions to find and identify your printer and install the driver
-
Upon completion, the wizard will confirm proper installation of the printer
Change driver settings
-
Navigate to the printer driver
- Right-click on the Windows button in your taskbar
- Select “Run” in the pop-up menu

-
Type “control printers” and select “OK” or press “Enter”

- Select your printer
- Right-click on your printer and select “Printing preferences” to open the printer driver

-
Make changes to the printer driver settings
- Go to the “Stock” tab

- Go to the “Stock” tab
-
Make changes to the printer driver settings
- Media Settings
- Change the Method to “Thermal Transfer”
- Change the Type to “Continuous”

- Media Handling
- Change Post-Print Action to “Cut”
- Verify “Occurrence: After Every Page” is selected

- Confirm the settings match those in the image below and press “OK” or “Apply” to accept and apply the settings. Close the window.

- Media Settings
-
Slide either tab located on each side of the printer forward, then lift the media compartment cover open

-
For ribbons with a 1” (25.4mm) paper core without notches, insert a green ribbon spindle into the paper core. Insert the side with the green key into the side of the core. The ribbon should turn counterclockwise when pulling out the ribbon that’s facing the green key side. Repeat for a 1” (25.4mm) ribbon rewind paper core without notches.
Note: Paper cores with notches do not need the green ribbon spindle.
-
To load a ribbon rewind paper core with notches into the top location, first insert one side into the spring-loaded right ribbon rewind hub. If you are using a green ribbon spindle inserted into a ribbon rewind paper core without notches, insert the solid black side into the spring-loaded right ribbon rewind hub. Next, slide the ribbon rewind paper core slightly to the right and drop the other side into the hole on the left ribbon rewind hub. Rotate to lock the ribbon rewind paper core into the left ribbon rewind hub.
Note: The green ribbon spindles are required for loading the ink ribbon into the printer. Do not throw them away.
-
Load the ribbon into the bottom location by first inserting the solid black side inside the paper core into the spring-loaded right ribbon hub. Slide the ribbon slightly to the right and insert the side with the green key into the hole on the left ribbon hub. Rotate to lock the ribbon spindle inside the ribbon into the left ribbon hub.

-
Pull the ribbon up over the printhead and use tape to adhere the ribbon leader to the ribbon rewind paper core. Using the green ribbon rewind gear, rotate the gear away from you until the ribbon leader is entirely wound on the ribbon rewind paper core and the ink portion of the ribbon is positioned over the printhead.
Note: Do not dispose of the ribbon rewind paper core after using up the ribbon. The used ribbon must be removed from the ribbon rewind paper core and be properly disposed of. The ribbon rewind paper core is needed when loading a new ribbon.
-
Press down on both sides of roll compartment cover to close gently

Follow these instructions to load the label roll:
-
Slide either tab located on each side of the printer forward, then lift the media compartment cover open

-
Slide either left or right roll guides outwards

-
Insert media roll with the label(s) facing up into the roll guides
Optional: Push down the curved green tab on the right roll guide to lock roll guides in place.
-
Slide green media guide tips to the approximate width of the label(s)

-
Insert media, label(s) facing up through both green media guide tips and adjust to fit the label(s) width. Pull media and place the leading edge of the first label onto the platen roller.
Note: Do not dispose of the ribbon rewind paper core after using up the ribbon. The used ribbon must be removed from the ribbon rewind paper core and be properly disposed of. The ribbon rewind paper core is needed when loading a new ribbon.
-
Press down on both sides of roll compartment cover to close gently

Design labels in just a few clicks with an easy interface, a library of templates and symbols, and virtual labeling design assistants.
-
Download LabelSuite™ Executable File here
-
Locate the executable file where you commonly save downloaded files
-
Ensure your Brother TD-4750TNWBCS printer is connected to the PC and powered on

-
Walk through each instruction in the software installation wizard
-
Upon completion, open the LabelSuite™ design software and get started
Design labels in just a few clicks with an easy interface, a library of templates and symbols, and virtual labeling design assistants.
-
Open LabelSuite™ software
-
Click “Create a new label” to begin your design
-
Select your supply type from the dropdown menu
-
Select your label and ribbon color
-
Set the label size and length you need
-
Use the “Insert” menu to add text, symbols, images, and other custom content
-
Click “Create label” when you’re done
Browse a wide variety of options for continuous and die-cut labels, as well as top-quality ribbons, to help meet safety label standards for pipe marking, secondary GHS, arc flash, general safety, 5S, barcode, facility, and more.
See a full list of labels and ribbons here. Contact your Brother Mobile Solutions representative to find an authorized reseller.
Tim Mansfield
Senior Inside Sales
[email protected]
If you run into a problem where the printer is not printing properly, we recommend performing an automatic calibration printer function. You may need to perform an automatic calibration when changing between different media types and sizes.
-
Press the “Menu” button

-
Use the arrow keys to move and highlight “Sensor” and press the button under the checkmark

-
Use the arrow keys to move and highlight “Auto Calibration” and press the button under the checkmark

-
Use the arrow keys to highlight “Preprint” and press the button under the checkmark

-
Use the arrow keys to select “Gap” and press the button under the checkmark


-
The printer will begin the calibration process. Do not interrupt the printer during this time. Once complete, the printer will be calibrated to the media.
Note: It is expected that a few labels will be wasted during the automatic calibration process.
From setting up your printer to installing ribbons and labels watch these videos for all the details you need.
Contact Brother support
Need more help? Save time and get answers by connecting with one of our experts today.

Get in touch
Contact your Brother Mobile Solutions representative to find an authorized reseller to purchase additional labels and ribbons.